Using Blender to export 3D model for 3D preview
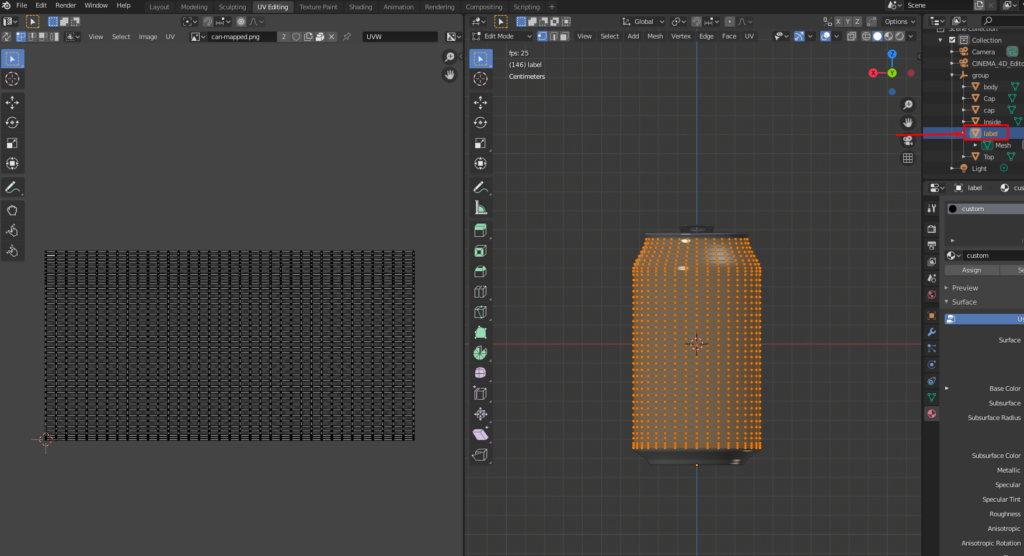
1 – Select mesh, create UV map and name for the mesh with special name which will used in product 3D preview setting
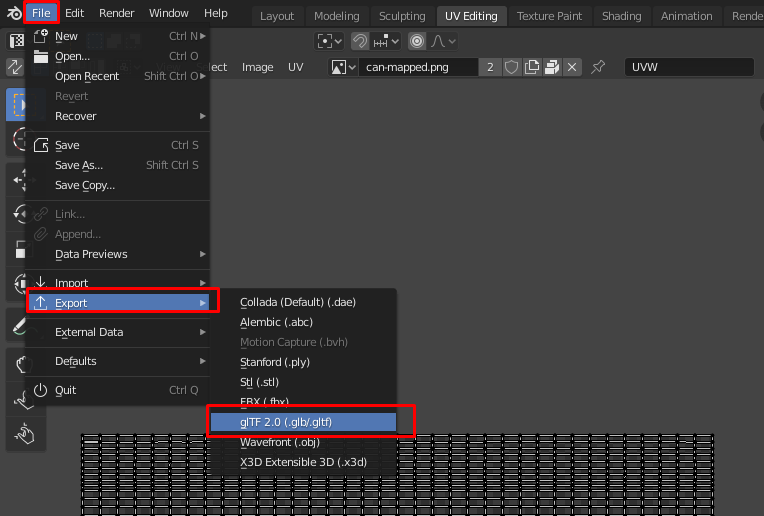
2 – Export model
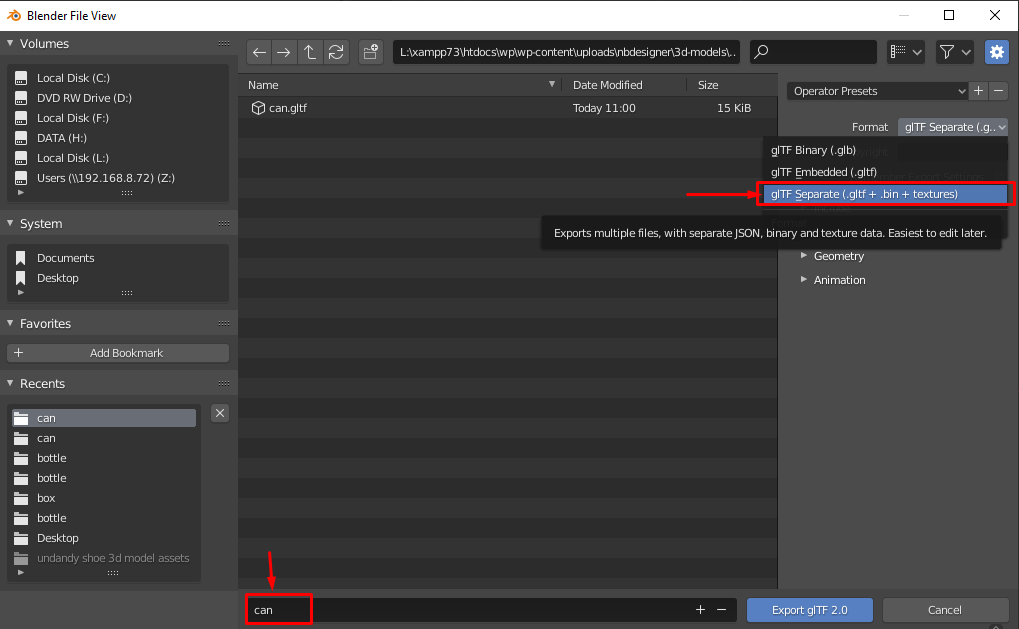
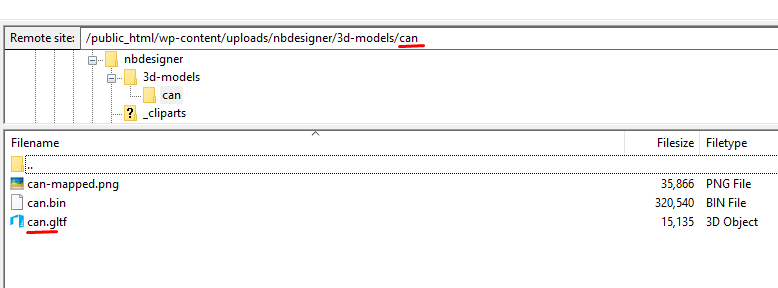
3 – Upload model to wp-content/uploads/nbdesigner/3d-models folder. Note: the folder name must be the same as the gltf file name, in our case they are ‘can’.
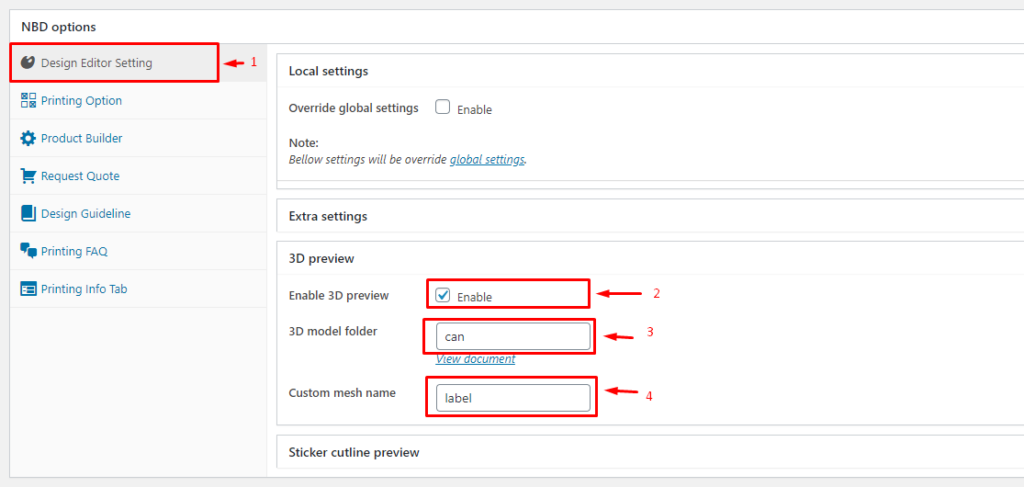
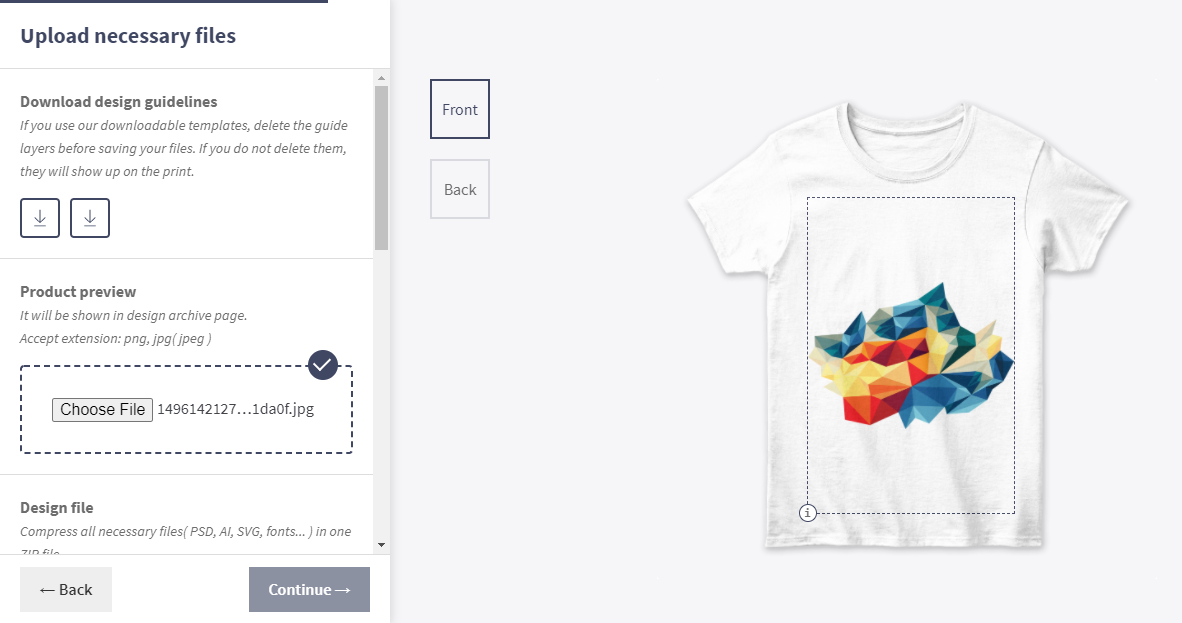
4 – Product setting